This is the multi-page printable view of this section. Click here to print.
Getting Started
- 1: 1. Planning Deployment
- 2: 2. Installing Synclias
- 3: 3. Configure app settings
- 4: 4. Configuring your first site
- 5: 5. Setting up auto-sync
- 6: OPNsense User Access Setup
- 7: Optional - Technitium User Account
1 - 1. Planning Deployment
Before you begin,let’s cover some pre-reqs you’ll need to cover:
1. OPNsense Router
Mandatory, I’m afraid!
2. Appropriate VPN
Any VPN you can configure on OPNsense should work, testing has only been performed with Wireguard VPNs though.
There is one additional caveat -
Your VPN provider must be able to support the type of IP setup that you have (IPv4/IPv6/Dual Stack IPv4+6)
Most providers support both these days
Using an IPv4 only VPN on a dual stack IPv4/6 network will result in traffic missing the VPN.
A guide for configuring a VPN can be found Here
3. An appropriate User Account on OPNsense
A guide to creating a user and API keys with the minimal needed permissions can be found Here
4. Where to run Synclias
Synclias can run anywhere you can run x86 containers.
However, you may consider deploying it on a server where you can forward all of it’s external traffic through a VPN, e.g. a VM/LXC. This will make scanning easier, avoiding problems where it can’t scan until after a Sync, but it’s not required.
Docker/Docker Compose
Before you get started, you’ll need a machine running Docker. The best place for guidance on this that I’ve seen is:
And also Docker Compose, a plugin for Docker
This is included in Docker Desktop for Windows/Mac.
For Linux - normally “docker-compose-plugin” from your package manager
If you want to use another container orchestrator, it should work fine.
5. Optional - Technitium API Token
Synclias provides optional support to clear cache entries from a Technitium server. It is not required for Synclias to function
This feature ensures the cache is refreshed with the largest possible expiration time for each site on each scan, and can provide benefits for some sites, but not all.
If you wish to use the cache clearing feature of Technitium, a guide for setup with minimal required permissions can be found here.
5. Understaning the Impact of Flush States
Flush States (an option in settings) is a very powerful tool for testing sites. It’s off by default, and generally should stay that way
- Normally, when Synclias syncs, it adjusts the ruleset, and that ruleset applies to new connections.
- If you’ve just been to a site and realised you need a VPN, you most likely have an “established connection” to that site.
- Flush States signals the router to drop any established connections
- This greatly increases the chance that when you revisit the page it works fine
- However, running this more than a couple of times in 10 minutes can cause visibile hiccups to internet connectivity.
6. Make sure you know the Emergency Exit
Synclias has been running fine for months in some environments.
However, it’s always good to know how to reverse anything when making a change.
- Log into OPNsense
- Find the Alias(es) in Firewall -> Alias
- Edit the alias
- Remove and listed IPs/Networks from the Alias
- Save
- Repeat for an IPv6 Alias, if you’re using one
- Apply Changes
- That’s it, completely backed out (and make sure you disable auto-sync if on)
7. An Understanding of Limitations
Before proceeding, it’s important to understand the limitations of Synclias.:
- Nothing it does should break any sites at all, but I’m not able to guarantee it, some site may do something truly bizarre with their code.
- You may end up at the site for your country once in a while - if a site moves IP before the next Sync
- This completely depends on the site, but in testing for over 50 sites, it was around once a month on average across all sites.
- Safety Keywords (dealt with in the setup guide) will save you a lot of issues with sites such as Youtube etc getting dragged into the VPN by accident
- Scans happen before sites are put into the VPN alias - this means the scanner cannot work on the first sync for some sites.
- Any VPN client will still function as a backup just fine
Finally, when first setting up a site:
- Browsers and cache can cause real headaches.
- You will often see advice to close/re-open another browser during setup. It’s strongly suggested to follow this guidance.
All done? Proceed to Installing Synclias
2 - 2. Installing Synclias
Get and Set the Config Files
Get the Files
- Most users only need the docker-compose.yaml file and sample-env , available at:
- That should be enough for most users, just the two files.
- If you’d like the full source, it’s available on Github
Configure your Install
- Copy the example-env file to .env (Note that’s <dot>env)
- Edit the file, some settings will need to be changed
- Looking at them one at a time:
| Line | Meaning | Suggestion |
|---|---|---|
| MARIADB_USERNAME | Database Username | synclias |
| MARIADB_PASSWORD | Database Password | Anything you want (In testing, I’ve had problems with “-” in the password) |
| MARIADB_DATABASE | Database Name | synclias |
| SECRET_KEY | Browser Data Encryption Key | See below |
| ENCRYPTION_KEY | Database Entry Encryption Key | See below |
| CONFIG_TYPE | ProductionConfig | Leave as is |
| #CLEAR_ADMIN | <Leave as is/> | Used for resetting admin password |
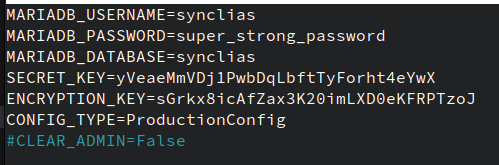
Secret and Encryption Keys
During the early releases, there’s a limitation on these:
- Exactly 32 Characters long
- Uppercase, lowercase and numbers only Remember when you put them in, you don’t need quote marks around them, just the plain string
Sorry!
I know this is a pain, I’d suggest a password generator, such as the one at - 1PasswordYou should end up with something like this:
Starting it Up
Almost there!
Just run
docker compose up -d
And let it all come up.
Once it’s working, you can access it at http://<docker-host>:8000 or http://localhost:8000 if running locally
If you get a page like this, set a password and you’re all set to start configuring!
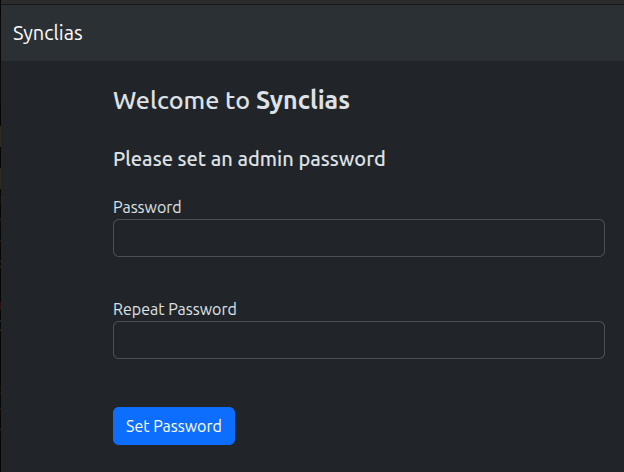
Next Steps:Configuring App Settings
Troubleshooting
Generally, the only issue that’s occured during testing for deploy this far is that the web/worker/beat containers won’t start up, complaining about MySQL denies
- This is normal during database startup, especially the first time
- There are healthchecks to prevent this, but some still slip through
- Give it a couple of minutes to retry
- If, after a few minutes, you’re still having problems:
- Stop the stack:
docker compose down
- Find the database server name
docker ps -a
- Delete the database server
docker rm <database name - probably synclias-db-1>
- Find the database volume
docker volume ls
- Be careful, and delete the volume:
docker volume rm <<database volume name>>
- Edit the .env file and set a simpler (not shorter, and not too simple) password
- Try without - signs or spaces
- Bring the stack back up
- Stop the stack:
3 - 3. Configure app settings
1. Set an Admin Password and Log in
When you first open Synclias, you’ll be asked to set an admin password. Once that’s done, go ahead and log in.
2. Configure Router Settings
You’ll be taken to the Settings page, with various sections for configuration.
Start with the Router settings section
If you need API Key/Secret - there’s a guide - Here
If you need Alias/IPv6 Aliases - there’s a guide - Here
| Setting | |
|---|---|
| Hostname | fqdn for your router - e.g. router.localdomain |
| API Key | API Key for the Synclias user on OPNsense |
| API Secret | API Key for the Synclias user on OPNsense |
| Alias | Name of the OPNsense IPv4 Firewall Alias to use for routing sites (typically “VPN_Websites”) |
| IPv6 | Whether or not to do the work for an IPv6 Alias |
| IPv6 Alias | Same as “Alias” but for IPv6, (typically “VPN_Websites_IPv6”) |
| Use HTTPS | Whether to connect using HTTP or HTTPS |
| Verify TLS | Whether a valid certificate is required for an HTTPS connection |
- Plug in all the values you need and click Save
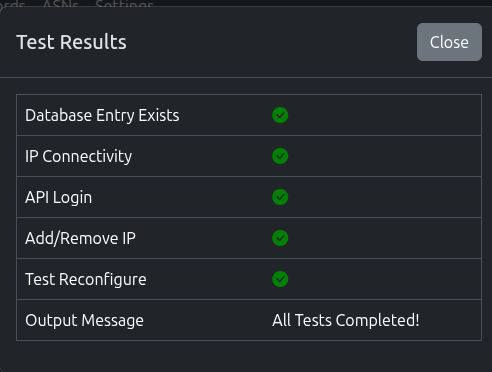
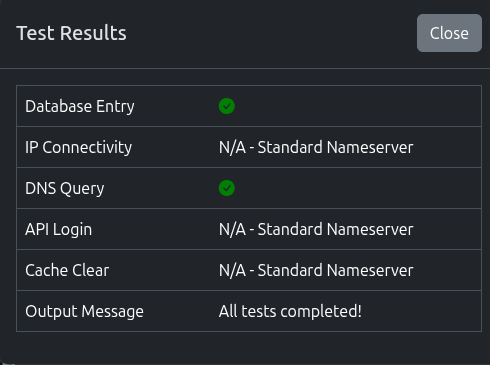
- Next, click Test and Synclias will run a suite of tests
- The test should report any issues with the setup
- Please ensure you click Save before Test
3. Configure Nameservers
Synclias needs to know what internal DNS you have.
During a scan, it will query all of them to:
- Get the largest set of IPs possible
- Ensure they’ve got cache entries for sites, which may reduce VPN misses
Do NOT add any external servers here
To add a standard DNS server: Click the Add Nameserver Button
- Enter the hostname/IP of the DNS Server
- Select Standard DNS
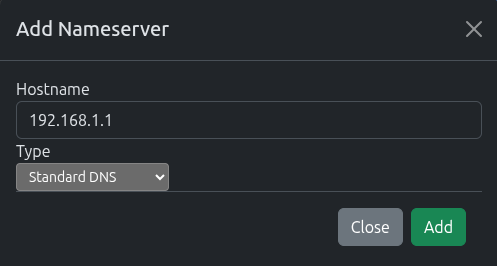
Once added, click Test for the nameserver to make sure we can query it.
4. Next Steps
That’s enough configuration for now, proceed to Configuring your First Site
4 - 4. Configuring your first site
1. Using the Scanner for your first site
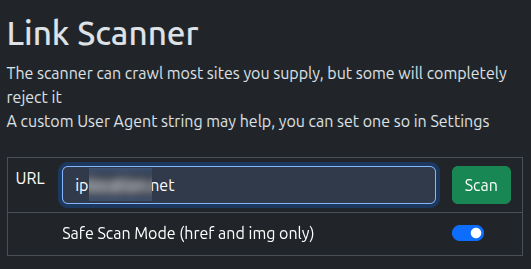
Head on over to the Scanner tab
Simple as can be, just type or paste in a website, and hit Scan If there’s something on a specific page that’s not working, try the whole page address.
The scanner will go off and hopefully pull back the page, and you’ll see a list of links like this:
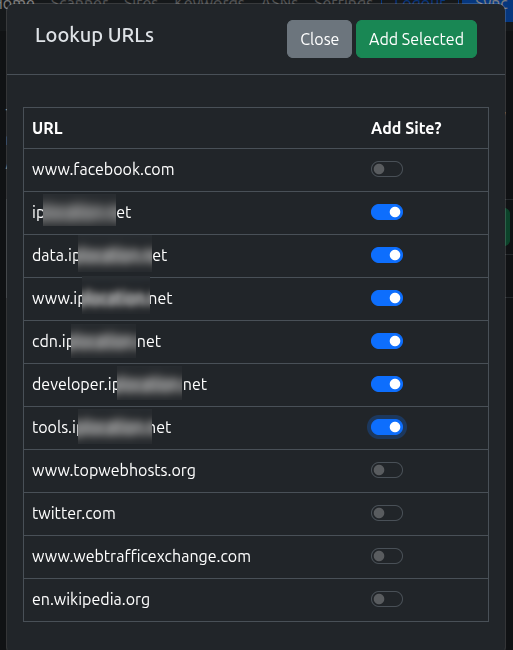
Pick the links you want to add to the VPN and click Add Selected If you’re not sure what to pick, see Guidance on Domains to add Try not to add everything!
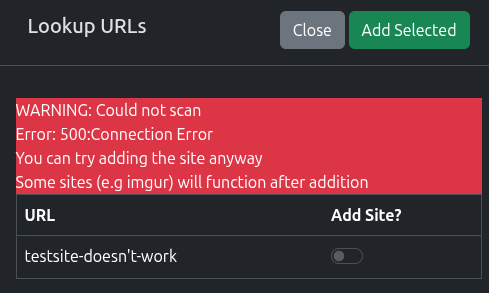
Sadly, some sites, won’t scan and you’ll see something like this, where you can still add the base domain of the site to the list. Do that, run a sync and try the scanner again. If not, have a look at the pages linked at the bottom of this page.
Remember - the scanner doesn’t go over the VPN (yet), so you might be able to scan after the first Sync.
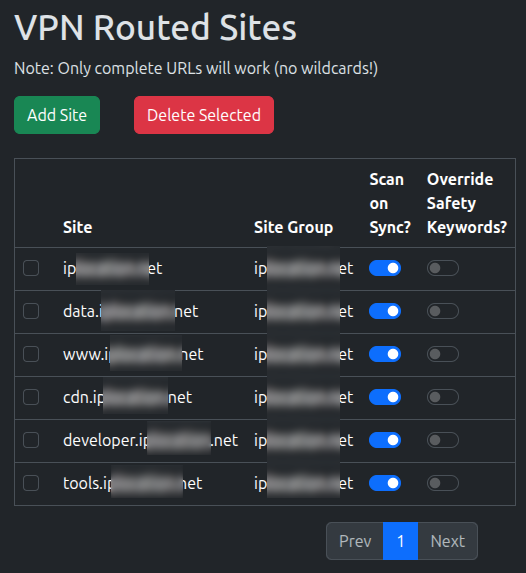
2. Review the Sites Added
You’ll be taken to the Sites page, where you new sites should be there.
Here, you can turn off Scanning the site when the Sync runs. For now, leave it on, but ideally, you want to turn it off for overlaps/most sites
3. Add some Safety Keywords
When it can crawl sites, the scanner works great, but it can get a bit over-ambitious, so we’ll need to reign it in a bit.
Most sites will have links to social media and other sites, places you don’t want to send over the VPN.
This is where Safety Keywords come in. They’re incredibly important in making sure you don’t start routing other sites
Any links the scanner discovers during a sync will be checked against any of the listed keywords, if that word’s in the address, it’ll drop it from the results.
Visit the Keywords tab and you’ll see a blank list for now.
Go ahead and add anything you think would be useful and/or click Import Suggestions

4. Turn on Flush States
Flush States forces the firewall to forget any established connection.
This works perfectly for testing as it removes a large unknown variable of whether a site is working. Most connections will automatically re-establish, however, it’s generally not desirable to have this happen regularly
If you wish to avoid having connections drop, please wait for connections to time out before testing a site. This can take a few minutes at least.
- Visit the Settings page
- Toggle Flush States on Sync to On

Once the site is working, Flush States should be turned off again.
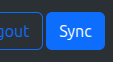
5. Run a Sync
That’s it! Click the Sync button and it’ll run off and apply the changes
You can monitor the progress in the top bar:
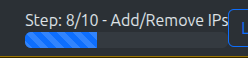
5. Check it Worked
That’s it!
If it’s your first sync, you may want to run it again to avoid the [Double Sync Problem]
Otherwise, open a new browser (don’t use the same one, for your first site, we want to make sure there’s no old connections hanging around) and test the site.
Whilst it’s been written a lot, it cannot be stressed enough how important opening a new browser here is.
This is your first site, let’s get a win, rather than mistaking an error.
“Established” connections can stick and you won’t see any changes.
If it didn’t work:
- Check if there’s new IPs in the Alias on OPNsense (System -> Firewall -> Alias)
- Have a look at the [Definitive Site Fixing Guide]
- Check the [Logging] for the “worker” container
If you used the same IP locating site as the demo and see your IPv6 change but not your IPv4:
- Go add “ipv4.ip……..* to the site list
- Have a read about “Safe Scanning” on the sites page
Next Step: Setting up Scheduled Syncs
5 - 5. Setting up auto-sync
Warning
1. Do not keep "Flush States" on for auto-syncs
2. Using a shorter sync time may seem like a good idea, but it really isn't.
Changes to firewalls can cause problems with connections clearing etc.
- This is made even more important when Flush States is enabled in App Settings as connections are dropped.
- Please turn this off for regular use
- You do not want all your firewall states to drop every X hours.
More details of the impact of Flush States can be found Here
You may also consider not turning on auto-sync and seeing how long it takes to start missing on its own, you may be surprised.
With site(s) added, you can set up a Sync schedule
- Head back to the Settings page and find the App Settings section
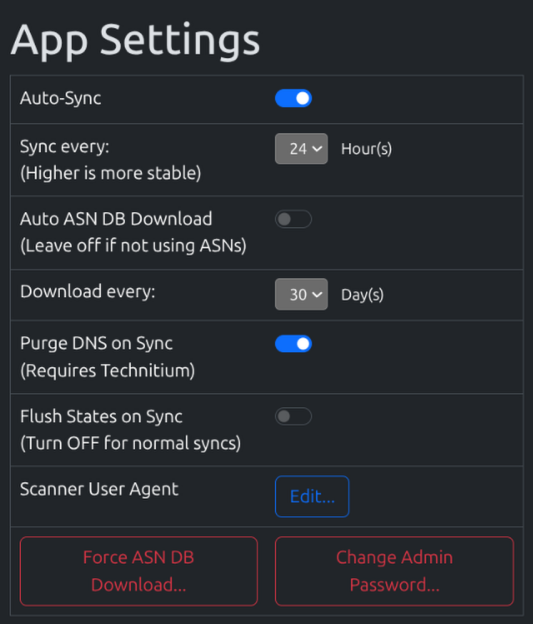
- Change Flush States on Sync to OFF
- Change Auto-sync to On
- You can adjust the sync schedule, at the start leave it at 24 Hours
As long as “Flush States” is Off, feel free to drop this as low as you like.
These settings apply automatically when set, and every 24 hours will schedule a sync for 0000 daily.
6 - OPNsense User Access Setup
Overview
Synclias requires API access to OPNsense, with permissions to view and edit Firewall Aliases and trigger a “reconfigure” to apply the changes
It assumes the VPN and Firewall Alias are already created as per that guide
This guide will:
- Create a group synclias_group with necessary pemissions granted to it
- Create a user account synclias as a member of the group
- Generate an API key/secret to allow Synclias to log in
This guide assumes access to the web interface with admin permissions
Create a Group
- Navigate to System -> Access -> Groups
- Click +
- Configure the new group with all settings at default, except:
- Group Name: synclias_group
- Privileges:
- Diagnostics: PF Table IP addresses
- Diagnostics: Show States
- Firewall: Alias: Edit
- Firewall: Alias
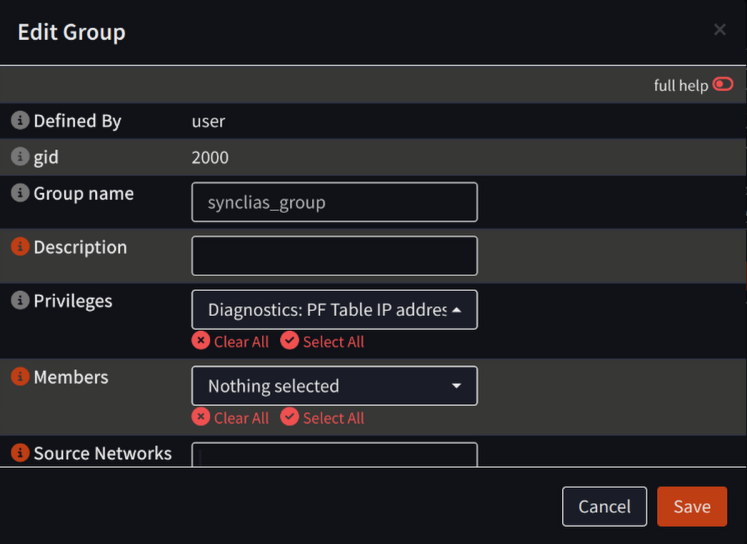
- Click Save .
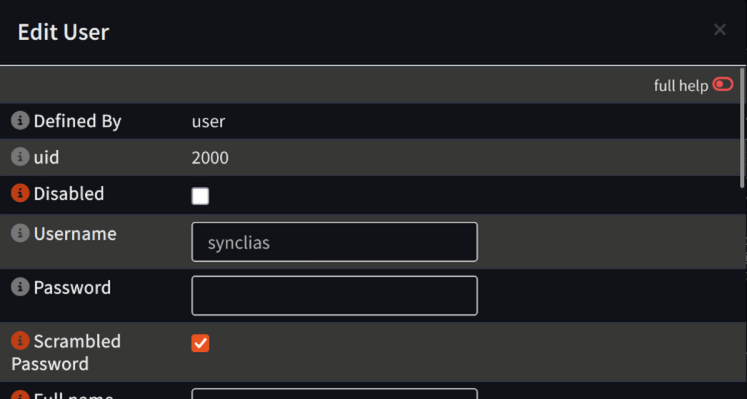
Create a User Account
- Navigate to System -> Access -> Users
- Click +
- Configure the new group with all settings at default, except:
- Username: synclias
- Scrambled Password: Checked
- Group membership: synclias_group
Top of Dialog:
Bottom of Dialog:
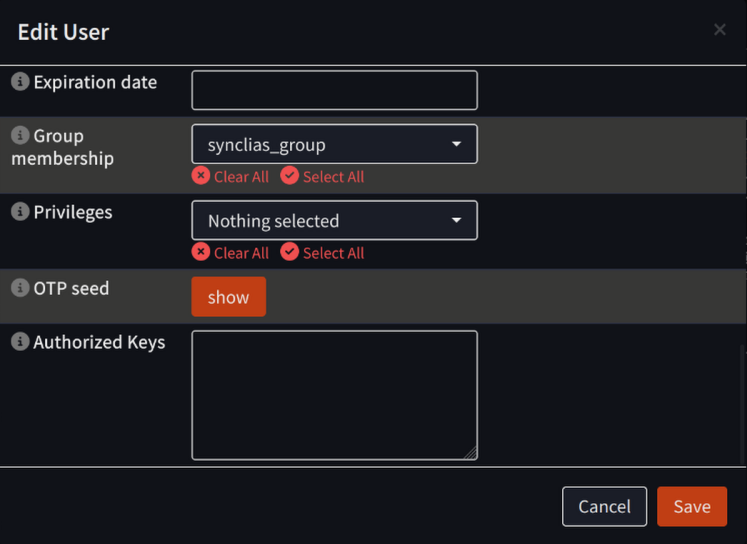
- Click Save
Generate API Key
- Navigate to System -> Access -> Users
- Locate the opn_alias user and in the Commands section click the button to Create and Download an API Key for this user (The icon looks like a rectangular ticket, and is to the left of the edit button)

- On the popup confirmation window, click Yes
- A text file will be downloaded containing “key=…” and “secret=…” lines, ensure to keep this safe
7 - Optional - Technitium User Account
Overview
Synclias can manage DNS cache on some DNS servers. At this time, only Technitium is supported as it’s a common DNS server that provides individual record clearing. Others, such as pi-hole need the entire cache cleared.
By having this access, whenever the sync runs the DNS records for individual records will be purged from the DNS cache and refreshed, rather than just queried.
For many sites this won’t make any difference, however for some sites it reduces the chance that clients will trigger an external lookup and get a different IP address for a site that the VPN is configured for
To allow this, Synclias needs very minimal access to Technitium, with permissions only to eject a site from the cache
This guide will:
- Create a User named “cache_clear”
- Create a Group called “cache_clear_group”
- Add the user to the group
- Grant necessary permissions to the group
- Create a user token for Synclias to use
All steps below assume access to the management web interface
User Setup
- Navigate to: Administration -> Users
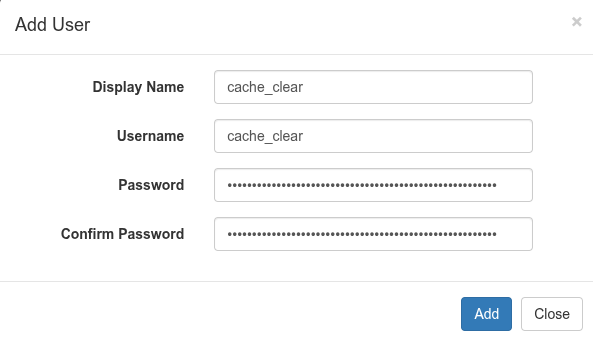
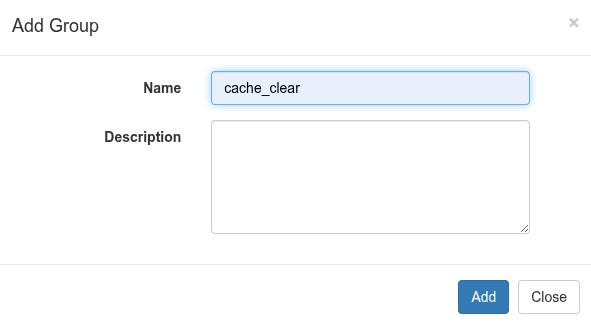
- Click Add User and create:
- Display Name: cache_clear
- Username: cache_clear
- Password: <Supply a very long password, this will never be needed>
- Click Add
Group Setup
- Navigate to: Administration -> Groups
- Click Add Group and create:
- Name: cache_clear_group
- Description: “Group for Synclias cache management users”
- Click Add
Add User to Group
- Navigate to: Administration -> Groups
- Click the cache_clear_group
- Use the Add User dropdown to add cache_clear to the group
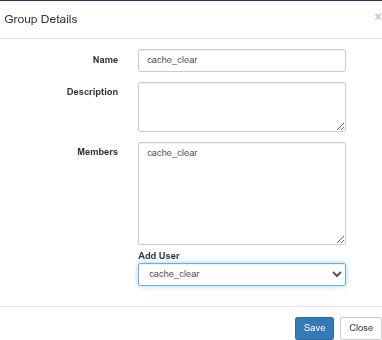
- Click Save
Grant Required Permissions
- Navigate to: Administration -> Permissions
- In the Section column, click Cache
- From the Add Group dropdown, select the cache_clear_group to add it to the Group Permissions section
- Ensure permissions for the cache_clear_group are set as follows:
- View: Empty
- Modify: Empty
- Delete: Checked
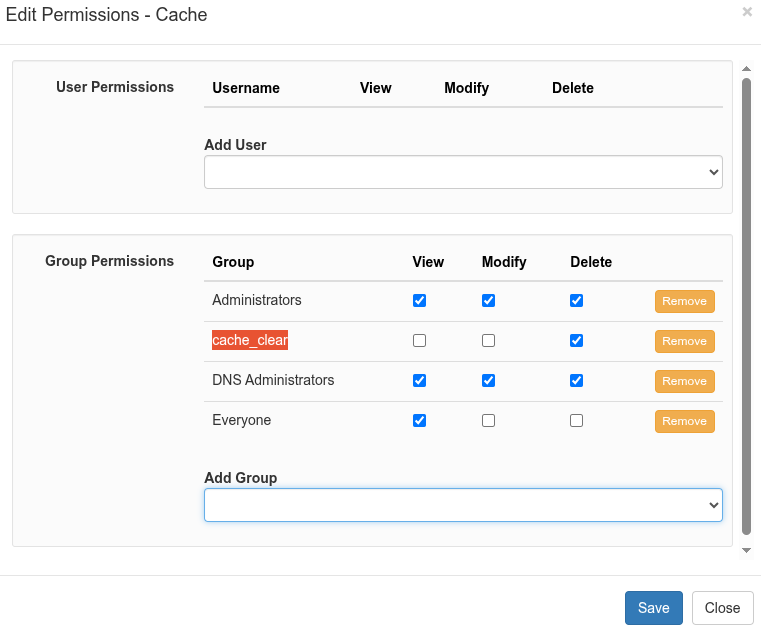 5. Click Save
Create a Token for the Account
- Navigate to: Administration -> Sessions
- Click Create Token and create:
- Username: select cache_clear from the dropdown
- Token Name: “Synclias Cache Clear”
- Click Create
- Note down the Token String. Once this window is closed there is no way to get the token displayed again
- Click Close