This is the multi-page printable view of this section. Click here to print.
App Pages
- 1: Safety Keywords
- 2: Sites, Scanning and Options
- 3: History
- 4: Resetting the Admin Password
- 5: ASNs
- 6: ASN Database
1 - Safety Keywords
Safety Keywords act as a safeguard against accidentally adding sites during a scan.
Modern sites contain links to multiple other sites that shouldn’t run over a VPN - Youtube, Wikipedia, Google etc. Obviously it’s undesirable for random sites to start having issues because they got picked up by accident.
Guide
- Safety Keywords are vital to you not routing random important sites
- You can add any text you want in the field
- Use Exact Match to allow you to specify sites that might get matched too widely
- e.g. “x. com” and “netflix. com” would both be covered by “x. com” without Exact Match
2 - Sites, Scanning and Options
Scanning Options
The has two modes, in general, a Safe Scan will get the domains needed, run that first, then try turning off the safety.
-
Safe Scan
- This option pulls the site page you supplied and makes a list of:
- Direct links (“href” links)
- Image links (“img” links)
- The site domain name of any link supplied
- This option pulls the site page you supplied and makes a list of:
-
Non-Safe Scan
- This option works slight differently, in steps:
- Collect the site content
- Look through the text for anything that looks like “http(s)://<something/”
- Check that’s a domain, then add it to the list
- This option works slight differently, in steps:
This is more likely to catch domains called by JavaScript that contain extra calls.
Tech Example
The site “iplocation.net” when connecting via IPv6 will report your IPv6 VPN address, and then make a Javascript call to “ipv4.iplocation.net”. This link is buried in JavaScript and isn’t detected by a Safe Scan
Options during Sync
On the sites page, each site has two options:
-
Scan on Sync
- This runs a Safe Scan whenever you Sync, to find any urls in there and add them to the list.
- Guidance - use this at first, but experiment with turning it off:
- Off - Sync will be faster
- On - More likely to catch any new domains
-
Override Keywords
- Keywords win whenever they exist, and the domain will be removed from the Sync list
- With this option, you can choose to force the domain back into the Sync list.
-
Also Use Historical DNS
- Will track IP addresses for a specific FQDN
- When a site’s IP addresses are queried, any historical IPs for the FQDN will be added to the firewall alias as well
- Note: This does not affect DNS resolution for the site, it just means if a site returns to an old IP, it’s already lined up
3 - History
History provides two subpages that provide information useful in adjusting site syncs.
Sync History
This page contains details on:
- Job start/stop
- Additional FQDNs discovered during site scanning and their parent site
- Sites that didn’t scan, and any technical details for this
- Sites removed by Keywords
- IP addresses added/removed
How to use this data:
- For FQDNs that don’t resolve consistently, it’s probably worth removing them from the Sites page, or if learned by discovery, add a Safety Keyword to remove them.
- For sites that don’t scan repeatedly, individual results vary, but you may consider:
- Disabling scanning for that site
- Non-scanning sites just add to scanning times
- Removing the FQDN from the sites page
- Adjusting the User Agent string in Settings
- Ensure the Double Sync problem isn’t affecting results
- Disabling scanning for that site
IP History
This displays the entire contents of the IP history table, sorted by FQDN, this can be useful for checking if a site is moving, and how often.
4 - Resetting the Admin Password
Synclias only contains one user, so resetting the admin password is fairly simple
- Stop the stack
- Edit your .env file:
- Uncomment the “CLEAR_ADMIN=” line
- Set the value to true
- Start the stack
- Stop the stack
- Revert the changes to .env
- Start the stack
Next time you access the system you will be taken to the “set password” prompt
5 - ASNs
ASNs are an incredibly powerful tool, but there can be unseen problems caused by using a VPN to route them.
Consider them a last resort, and never add huge ASNs like those for Google/Amazon etc. You’ll end up routing anything on AWS etc over the VPN
Generally, if you’re unsure, never add an ASN, it won’t fix that one site that just won’t work
Every subnet on the internet is managed by an organisation. They’re grouped into Autonomous System Numbers (ASNs)
Occasionally, it can be useful to route an entire ASN over the VPN
Looking up ASNs
The ASN page contains a lookup tool that can tell what ASN a site belongs to.
Simply enter the domain into the lookup form and click Lookup
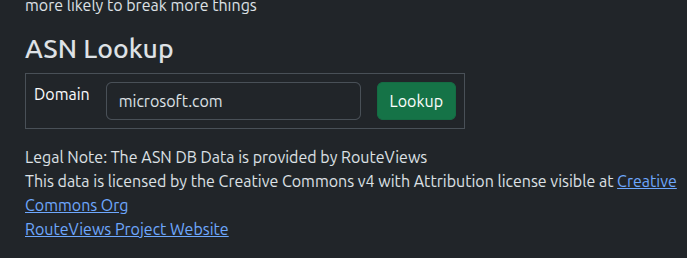
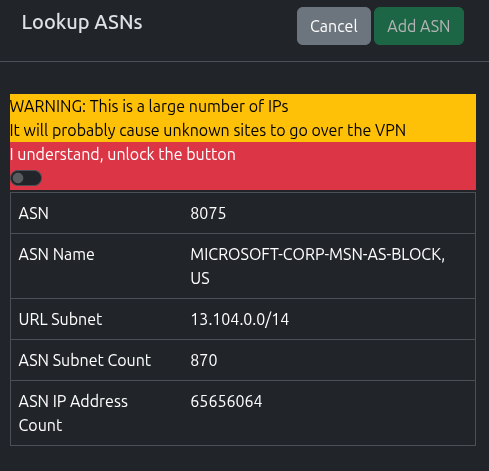
Once the lookup is complete, you’ll be presented with the results, including a count of subnets and IP count.
6 - ASN Database
{% alert %} Automatic download functionality is currently disabled to allow the beta to ship, it will be re-enabled when I can be certain it’ll work. {% /alert %}
Recommended Settings: If you’re not using ASNs, you don’t need to worry about the ASN database, nd don’t worry about making sure you’ve got the latest version all the time.
The ASN database is downloaded from the Route Views project.
This project does amazing work in assembling this data, however there are sometimes problems downloading it (stalled/slow connections), which can stall out the worker container.
Updating the Database
If you would like to upgrade the database to a newer version, it can be performed as follows.
You will need the “pyasn” package from pip installed. this will provide three utility scripts.
Or, if you’re on a Linux system, it’s normally bundled with “python3-pyasn” package for your distro, and can just run these commands from the cli after installing it.
## Download the full rib file
pyasn_util_download.py --latestv4 --filename latest.rib

## Convert that file to a usable format
pyasn_util_convert.py --single latest.rib asn_db

## Download the ASN Names file
pyasn_util_asnames.py -o asn_names

## This will give you two files - asn_db and asn_names

## Get the name of your web docker container
docker ps
## Look for the container name similar to "synclias-web-1"

## Copy the files into the web container
docker cp asn_db synclias-web-1:/app/shared/
docker cp asn_names synclias-web-1:/app/shared/
That’s it! The server will automatically pick up the files when needed.