3. Configure app settings
Router and DNS settings
Categories:
1. Set an Admin Password and Log in
When you first open Synclias, you’ll be asked to set an admin password. Once that’s done, go ahead and log in.
2. Configure Router Settings
You’ll be taken to the Settings page, with various sections for configuration.
Start with the Router settings section
If you need API Key/Secret - there’s a guide - Here
If you need Alias/IPv6 Aliases - there’s a guide - Here
| Setting | |
|---|---|
| Hostname | fqdn for your router - e.g. router.localdomain |
| API Key | API Key for the Synclias user on OPNsense |
| API Secret | API Key for the Synclias user on OPNsense |
| Alias | Name of the OPNsense IPv4 Firewall Alias to use for routing sites (typically “VPN_Websites”) |
| IPv6 | Whether or not to do the work for an IPv6 Alias |
| IPv6 Alias | Same as “Alias” but for IPv6, (typically “VPN_Websites_IPv6”) |
| Use HTTPS | Whether to connect using HTTP or HTTPS |
| Verify TLS | Whether a valid certificate is required for an HTTPS connection |
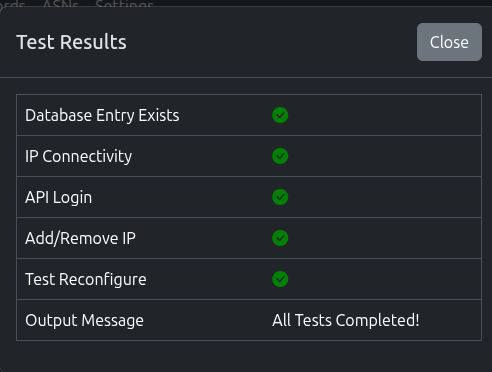
- Plug in all the values you need and click Save
- Next, click Test and Synclias will run a suite of tests
- The test should report any issues with the setup
- Please ensure you click Save before Test
3. Configure Nameservers
Synclias needs to know what internal DNS you have.
During a scan, it will query all of them to:
- Get the largest set of IPs possible
- Ensure they’ve got cache entries for sites, which may reduce VPN misses
Do NOT add any external servers here
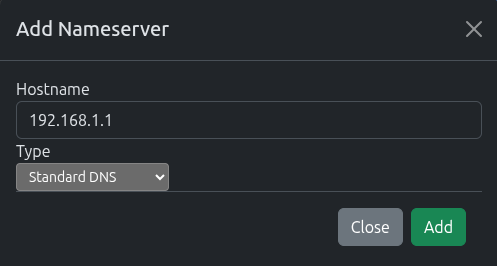
To add a standard DNS server: Click the Add Nameserver Button
- Enter the hostname/IP of the DNS Server
- Select Standard DNS
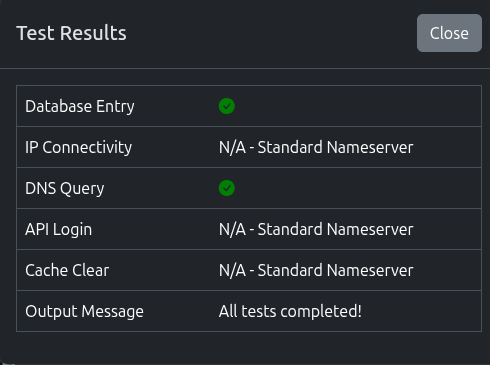
Once added, click Test for the nameserver to make sure we can query it.
4. Next Steps
That’s enough configuration for now, proceed to Configuring your First Site