Optional - Technitium User Account
Overview
Synclias can manage DNS cache on some DNS servers. At this time, only Technitium is supported as it’s a common DNS server that provides individual record clearing. Others, such as pi-hole need the entire cache cleared.
By having this access, whenever the sync runs the DNS records for individual records will be purged from the DNS cache and refreshed, rather than just queried.
For many sites this won’t make any difference, however for some sites it reduces the chance that clients will trigger an external lookup and get a different IP address for a site that the VPN is configured for
To allow this, Synclias needs very minimal access to Technitium, with permissions only to eject a site from the cache
This guide will:
- Create a User named “cache_clear”
- Create a Group called “cache_clear_group”
- Add the user to the group
- Grant necessary permissions to the group
- Create a user token for Synclias to use
All steps below assume access to the management web interface
User Setup
- Navigate to: Administration -> Users
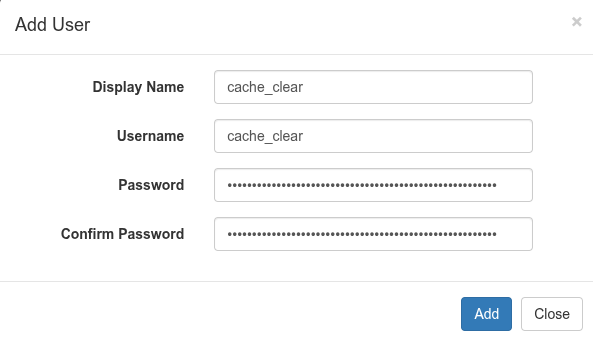
- Click Add User and create:
- Display Name: cache_clear
- Username: cache_clear
- Password: <Supply a very long password, this will never be needed>
- Click Add
Group Setup
- Navigate to: Administration -> Groups
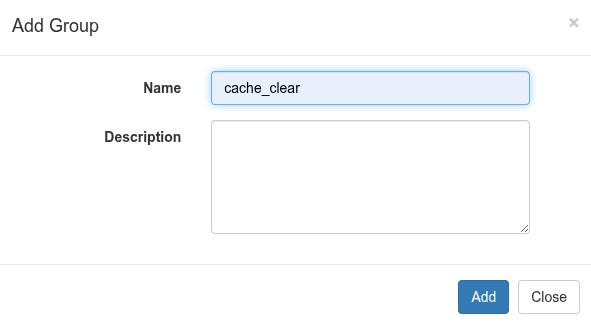
- Click Add Group and create:
- Name: cache_clear_group
- Description: “Group for Synclias cache management users”
- Click Add
Add User to Group
- Navigate to: Administration -> Groups
- Click the cache_clear_group
- Use the Add User dropdown to add cache_clear to the group
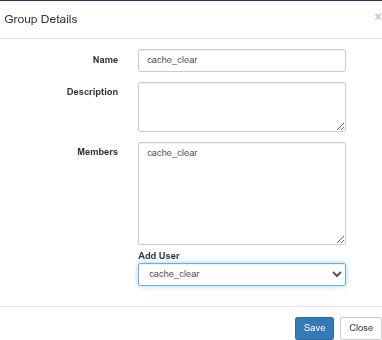
- Click Save
Grant Required Permissions
- Navigate to: Administration -> Permissions
- In the Section column, click Cache
- From the Add Group dropdown, select the cache_clear_group to add it to the Group Permissions section
- Ensure permissions for the cache_clear_group are set as follows:
- View: Empty
- Modify: Empty
- Delete: Checked
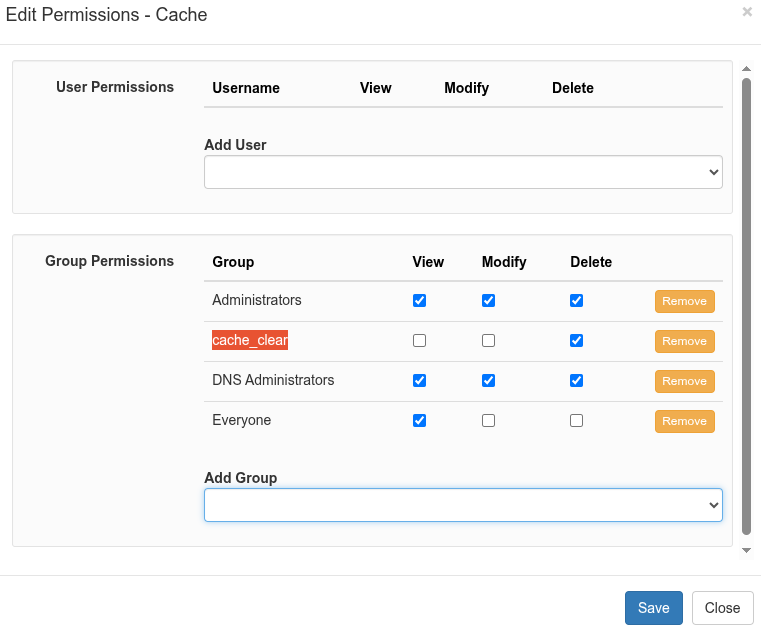 5. Click Save
Create a Token for the Account
- Navigate to: Administration -> Sessions
- Click Create Token and create:
- Username: select cache_clear from the dropdown
- Token Name: “Synclias Cache Clear”
- Click Create
- Note down the Token String. Once this window is closed there is no way to get the token displayed again
- Click Close