Part 3 - Interface and Gateway
Categories:
This is Part 3 of the VPN configuration.
Following the cable analogy, we now need to add the network card (Interface), and give it an IP address so we can talk to it (Gateway)
This section will:
- Create an Interface for the VPN
- Add Gateway(s) to the Interface to allow traffic routing
Create the Interface
- Navigate to Interfaces -> Assignments
- In the Assign a new Interface section ensure the wg_mullvad_instance is selected
- Enter a Description e.g. - WG_MULLVAD
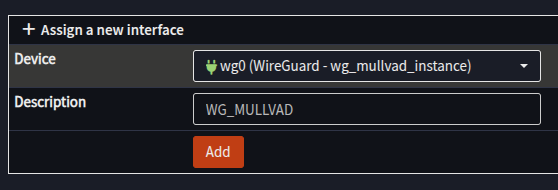
- Click Add
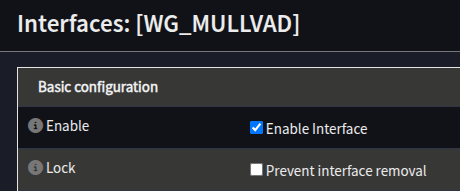
- [WG_MULLVAD] should appear in the left hand menu
- Select the [WG_MULLVAD] interface
- Tick Enable Interface
- Set the MTU and MSS to 1420

- Click Save
- At the top of the screen a message will appear, click Apply Changes
Creating the IP Gateway(s)
Next, our Gateway IPs will be configured on the new Interface:
- Navigate to Interfaces -> Gateway
- Click + to add a new Gateway
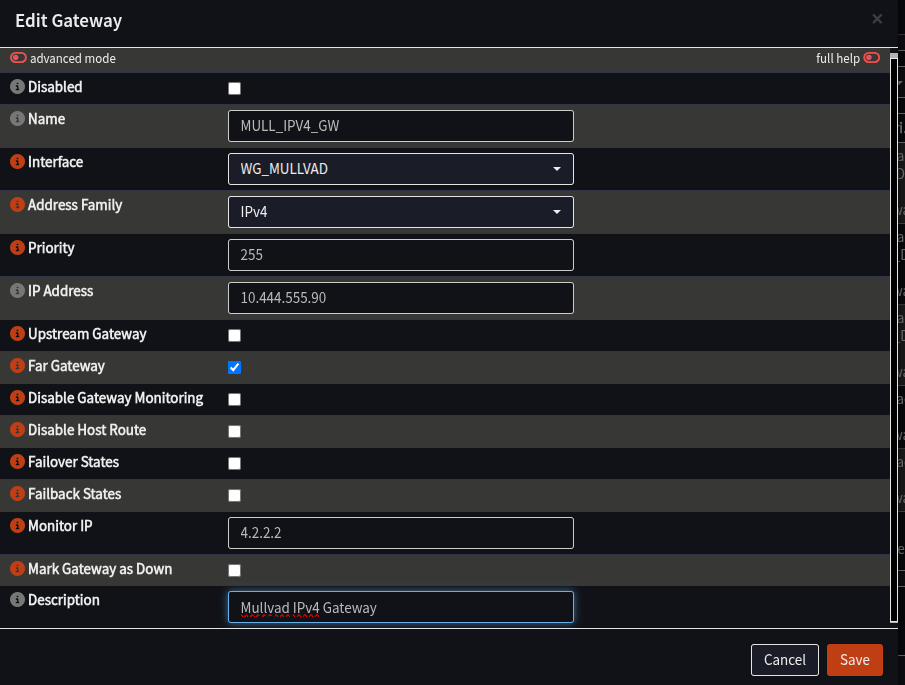
- Fill in the form as follows:
| Field | Value | Notes |
|---|---|---|
| Name | MULL_IPV4_GW | Anything you prefer, but will be needed later |
| Interface | WG_MULLVAD | |
| Address | Gateway_IPV4 from Wireguard config | Just the IP, no “/32” |
| Far Gateway | Checked | |
| Disable Monitoring | Unchecked | |
| Monitoring IP | 4.2.2.2 | Any IP on the internet to test with, suggest 4.2.2.2 |
| Description | Mullvad IPv4 Gateway | Any description you like |
- Click Save
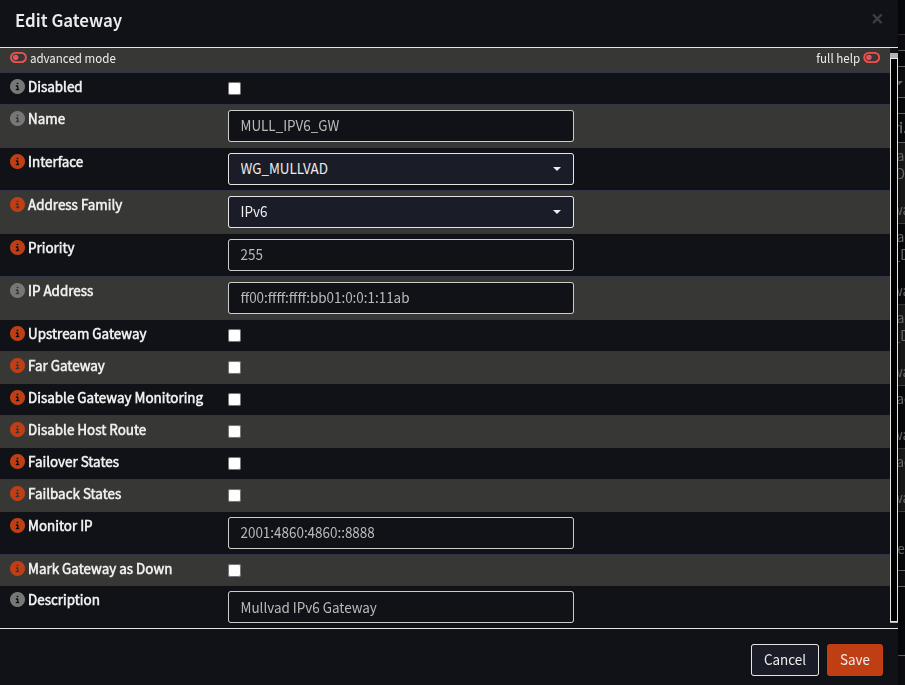
- If you have an IPv6 in your config file, repeat the process to add another gateway, but this time: (Skip this step if there is no IPv6 in your config file)
| Field | Value | Notes |
|---|---|---|
| Name | MULL_IPV6_GW | Same as above, but with IPv6 |
| Interface | WG_MULLVAD | |
| Address Family | IPv6 | |
| Address | Gateway_IPv6 from config file | No /127 or /128, just the IP |
| Far Gateway | Unchecked | |
| Disable Monitoring | Unchecked | |
| Monitor IP | 2001:4860:4860::8888 | Any IPv6 Address, example is Google DNS |
| Description | Mullvad IPv6 Gateway | Any description you like |
- Click Apply at the bottom of the screen
- Wait at the Overview screen for about about 15-30 seconds to start monitoring
- Click Refresh
- You should see both new Gateways with a green Status, and a time in ms in the “RTT” column:
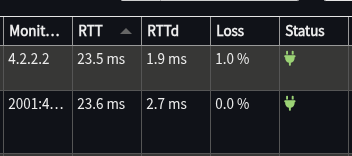
If the Status is fine, this section is complete. The VPN is connected and now has a way to send traffic over it.
The final part is to configure the firewall/NAT to allow and send traffic that way, which takes place in part 4.